Last updated on April 13, 2024 by Tyler Trowbridge @ Bella Turf
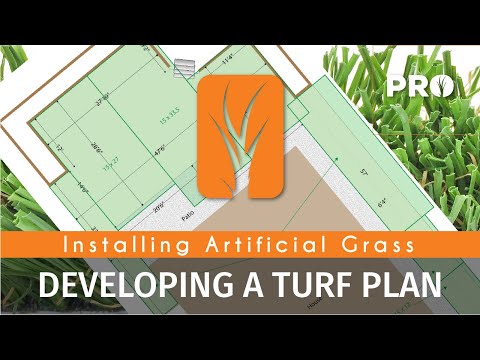
1. Developing a Turf Plan
Click here to download Bella Turf Design Plan.
Having your artificial grass installation turf plan in place before starting your project is an essential step to a quality artificial grass installation. Measuring and mapping out your yard will help you choose the layout that fits best and creates as little waste as possible. Keep in mind, most of our artificial grass products come in 15’ widths, but if you’ve got seams to do, account for 14.5-foot grass sections.
Consider the direction of the blades when planning your install, as our shaped yarn products are directional. The Bella Turf product line features a wave blade, soft blade, u-shape blades in two colour options, pet-specific artificial grass, economic and flat yarn grass options.
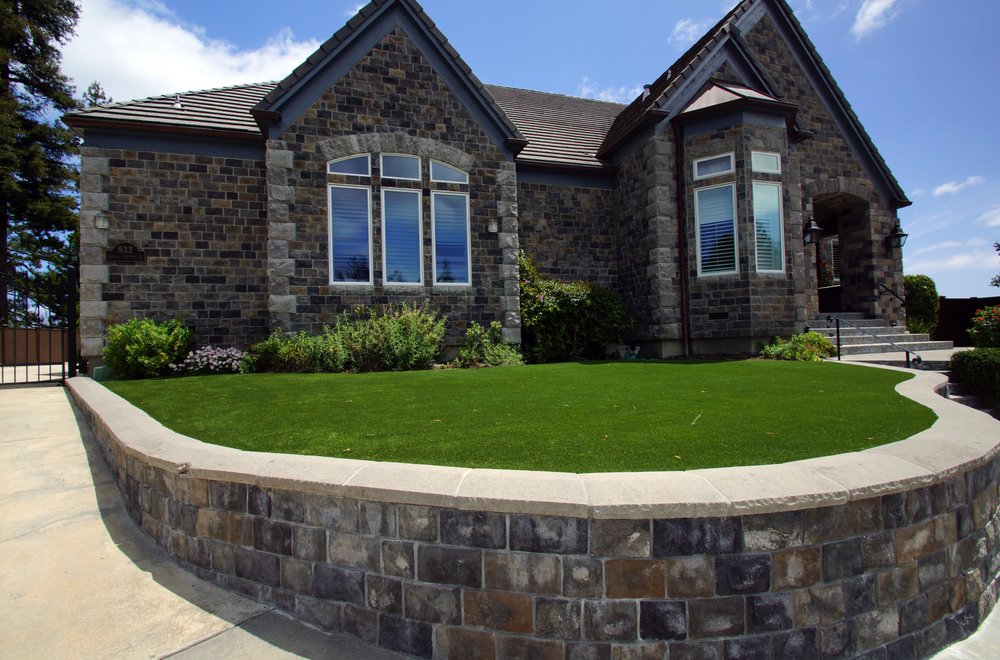
Our customers all have different needs. Choose a product and an artificial grass installation that is right for you. Bella Turf has artificial grass, installation supplies, artificial grass infill, and all the support you’ll need.
Plan out your base from the square footage gathered from your measurements. Product and depth may vary based on the application and or climate. For calculating everything from your infill down to your base, explore our website and most importantly; review our recommended base models.

2. Preparing the Base for Artificial Grass
Click here to download Bella Turf Design Plan.
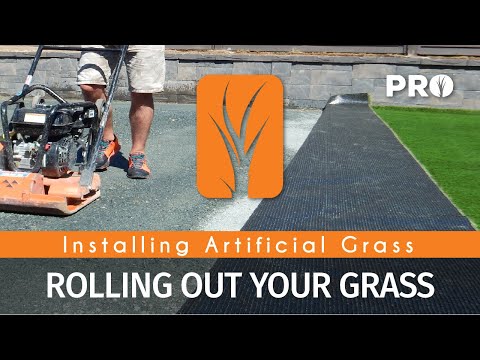
Before bringing in base materials, the soil beneath should be shaped to accommodate drainage throughout the yard. A 3/4” clear crush can be used in drainage channels or as a first layer base for additional drainage.
The base is built with a 4 to 6 inch layer of 3/4” crush and fines. Place and rake the gravel out evenly to your desired grade and then give your project area a thorough soaking.
Once the base layer is nice and wet, run the plate compactor over the entire surface to compact the gravel into place. Remove any big rocks and be sure to ramp down areas not reached by the compactor.
The shape of your base will be the shape of your finished yard. Take the time to look for any high spots or low spots before bringing in the final base layer.
Rock dust is used as a skim coat to create an ultra-smooth base beneath your grass. You want a half-inch of material spread evenly across your project. Place material all over to avoid disrupting the compacted base with excessive raking.
Once it’s all placed, Smooth the rock dust out, fill any low spots and remove any rocks left behind.
Give your project area another thorough watering, there should be no visibly dry spots. Smooth away any bumps or debris with a broom before your final compaction.
If your moisture level is right, the compactor should leave your surface looking as smooth as concrete when you are done. Start with the edges and work in a spiral pattern. Always overlap your seams and be sure your entire surface is compacted.
Clear away any remaining rocks and high spots and check all of your edges. The smoother your base, the smoother your artificial grass lawn.
With the base looking good and ready for surfacing, it’s time to pull a tape measure and put some reference marks down according to your turf plan.
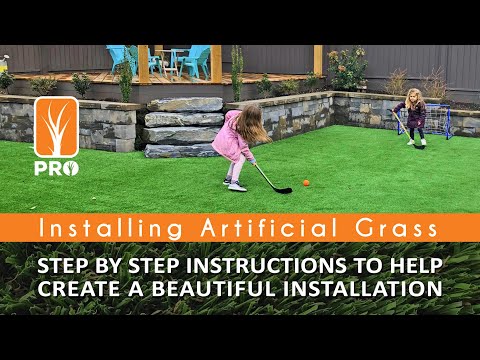
3. Rolling Out Your Artificial Grass
With the base finished up and a turf plan ready to go, use marking paint and mark out your project area with reference marks for where your turf seams will land. Determine which size roll needs to be installed first and remove any packaging. A sharp blade with light pressure does the trick. If available, roll the grass out on a flat surface, it will make the next steps quick and easy.
When you know there are going to be seams, it’s best to prepare your edges before putting the grass in place. We recommend removing the outer three tufts on your seeming edge, trimming the backing tight to the tuft being seemed and the excess backing removed.
This artificial grass installation requires some narrow lengths of artificial grass so we will be measuring and cutting those in advance to make this easier. The edge being cut here is a border edge and not a seam, so we can simply cut right down the centre of the tufts, giving us our first piece to lay against the far edge of the yard.
With as many pieces pre-cut as possible out on the flat road, it’s time to roll them up and get surfacing.
This is the first full width roll going in. The edges need trimmed carefully for a perfect seam, so we are going to go ahead and remove the outer three tufts from this piece.
Just to show, let’s cut one tuft off and see how hard the blades are leaning outward. By removing three tufts, you are left with a nice vertical edge to seam with. Finish off that cut all the way down the piece and it’s time to float it into place.
By keeping the edge of the artificial grass pulled tight and waving a bit of air under it, you can gently shift your pieces into place without disrupting the base beneath.
With your artificial grass in place and edge cut for a seam it’s time to bring your next roll in. Gently place it on the grass and roll it out. This piece is a bit tricky and it will be cut in around an object. Let’s get it close to position before we move on to cutting the artificial grass.
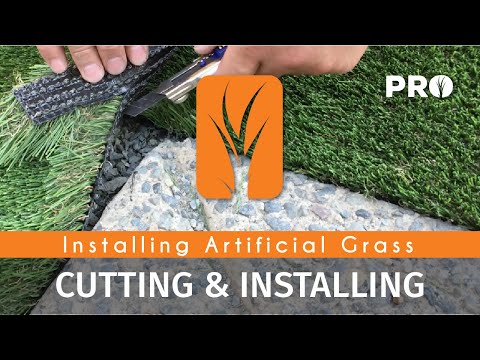
4. Cutting & Installing Artificial Grass
Our knife of choice for cutting artificial turf is a snap blade X-Acto knife with 18mm black Olfa blades. If you are installing artificial grass up to a patio or garden edge, it’s safe to remove just the outer tuft along with your factory edge. If you are cutting to prepare for a seam, always remove the outer three tufts and the factory edge. When your two pieces of grass are laying side-by-side, the joining blades want to be standing vertically, not leaning towards each other.
When trimming out your project to a patio edge or garden edge, you want to make sure you have enough blade sticking out of your knife to be cutting the backing before the blades. With your knife in one hand, grab the side of the grass being removed and pull it back to expose the backing. Read our “cutting to a curved edge” guide here.
When cut, the backing should be tight to the patio edge without touching and your gap should be no bigger than 1/8 inch.
With a saw-like motion, reach forward and down with the blade and in an upward motion pulling back, simply cut the backing away losing very few blades.
Cutting up to a wall or fence requires a bit more patience, but with a sharp blade and steady hand, you will make quick work of your cuts. Folding the turf back, press it tight to the corner and place your blade against the backing where it lands closest to the wall. Lift the turf up, cut 6 inches at a time, then lay it back down to check the fit. Take your time, you don’t want the backing tight against your edges.
Relief cuts are essential when cutting around corners, trees or posts. Start from the furthest outward point and cut through from the backing out to the edge of the artificial grass. Remove any excess artificial grass so that your next cut is more manageable.
Similar to cutting against a wall or a fence, fold the turf back, eyeball the point where the backing meets the object and make small outward relief cuts. This allows you to then cut from point to point, fitting your artificial grass to the objects exact curvature. Take your time around curves and angles so that there are no voids when you are finished cutting. A sharp blade will give you a clean cut with out fraying the edge of the backing.
When you’re finished with your cuts, the grass should lay loosely around any objects without touching them. This will make for a beautiful, more natural look around stone, block trees, or whatever perimeter you may have on your install site.
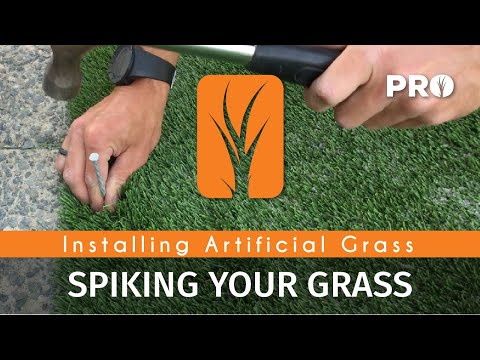
5. Spiking Artificial Grass
Depending on the amount of foot traffic anticipated on and off the artificial grass, we recommend spiking patio edges every 4 – 6 inches with a spiral galvanized spike.Use the tip of the spike to pull the blades back exposing the backing beneath. Use your thumb and forefinger to keep the blades spread apart while you tap the spike down. It should rest flat against the backing with no blades trapped down by the spike.
You want the spike to sit a quarter to half inch away from the edge of the turf. Any closer may cause the edge to curl down creating a void, and spiking further away can cause the edge to lift up. Make sure the heads of your spikes are sitting flat to the backing, but do not pound them down any further as you will leave indentations in your base that will be visible later. The heads of your spikes will all be covered with infill and will no longer be seen or felt when you are finished with your artificial grass installation.
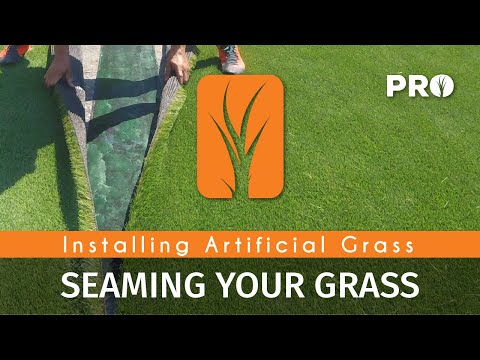
6. Seaming Artificial Grass
A great artificial grass seam starts with the correct preparation. If you remove just one outer tuft and seam that edge, it will be extremely visible with the blades pressing together looking like a Mohawk. Removing the outer three tufts along with the factory edge will give you a vertical row of blades that line up perfectly with the piece of artificial grass you are seaming to. If the space between the tufts on your chosen grass is 3/8 of an inch, you want the two rows being seemed together to have that same spacing between them. With the flat backing removed right up to the last tuft on your piece, you are ready to line up your second piece of artificial grass.
This piece requires extra adjustment to be properly aligned. Folding one side back to narrow our roll and waving a bit of air underneath allows a gentle repositioning. Fold the outer flap back on your seam edge and remove the outer three tufts.
Be sure to keep your blade tight to the piece being seamed so that all excess backing is trimmed away with the waste. With both edges cut off align your pieces so that the Tufts land the same distance apart and they are throughout your turf. You should see an 1/8 to 1/4 inch gap max with no excess backing left behind.
After thoroughly checking your seam up and down for spacing, roll out your seam tape and cut it the length of your seam. Then you want to fold both sides of the artificial turf back 12” and lay the artificial grass seam tape centered down your seam with no folds or wrinkles.
Once the artificial grass seam tape is in position, put a spike in the corners of your to hold it in place. Trim any excess seam tape off flush to your project edge. With the seam spacing triple checked and the seam tape secure to the base, it’s time to spread out some TurfTac artificial grass seam glue.
Work in sections, pour the seam glue in a zigzag pattern down the center of the seam tape in a consistent fashion. Using a flat spreader, carefully coat the end of the seam tape and spread the adhesive evenly removing all puddles and leaving behind no dry spots on the scene tape. A thin consistent coat is ideal as the TurfTac adhesive expands when cured and can come up through the drainage holes in turf if applied too heavily. Please take this into consideration when gluing your seams and do not over apply. TurfTac artificial grass seam glue is a strong adhesive.
Try to avoid dragging rocks onto your seam tape when spreading. If you end up with a little too much glue at the end of your seam, simply drag it off into your base material and it will cause no harm. With the adhesive in place and extra hands available, it’s time to put this seam together.
For a longer seam like this, you can pull both ends back and start by carefully closing the centre together. From the end of the seam, slowly bring the two pieces of artificial grass together evenly like a zipper. Don’t let one side get ahead of the other, you risk trapping grass blades down in the glue. Work slow and keep your eyes if you inches ahead of the closure to assure perfect alignment between the two pieces as you lie them down together.
With one side closed up, put some weight in the centre to prevent the grass from lifting as you work down the other side of the seam. This side was pulled farther apart to prevent it from accidentally closing up. If they are too far out, you can slowly roll them until they are manageable with both hands.
Do not to allow the artificial grass to flip over onto the glue before you are ready to lay the seam down. Working from the open end of the seam, grab both pieces of turf firmly and allow the seam to start coming together from the centre working towards the open end. Keeping your eye on where the grass meets is crucial for perfect alignment and assuring that there are no blades trapped down in the glue once your seam is laid down.
With the seam complete, firmly press the ends down and work your way back down the seam with pressure to help the adhesive penetrate up into the tufts and backing.
It’s always safe to double-check your spacing before placing bags of infill, or 12” wide boards with bags on top of them, down your entire seam for a minimum pressing time of 45 mins. This allows the adhesive to cure and create a bond between two pieces that is inseparable.
Once the TurfTac is cured and the weight is removed from your seam, you are ready to move onto the next step.
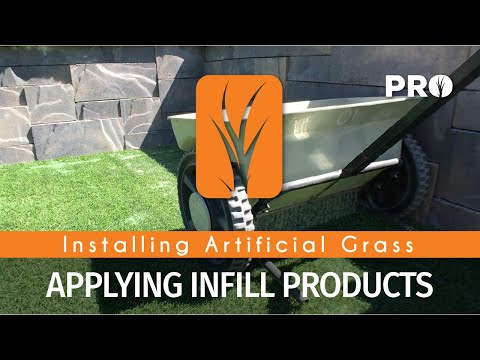
7. Infilling Artificial Grass
The type of artificial grass infill used on your project is specific to the chosen application. In this case, there will be both kids and pets using the grass, so we went with a 50 percent PureZEO Pro infill and 50% Wonderful infill. We are putting in the PureZEO Pro first as a deodorizing layer and capping it with Wonderful.
Place a bag in your wheelbarrow and slice the bottom open with your X-Acto knife. You can infill the bulk of your artificial grass with a drop spreader, but always have a grain shovel for filling the edges and corners of your artificial grass.
With a nice even load of infill, hold the shovel so that the head is level to the ground and move in a backwards swooping motion, dropping a consistent amount of infill with each pass. This technique takes some practice, but once you dial it in, you can infill smaller projects this way.
If you choose to do so, always keep level scoops and be sure that the right side of your shovel is dropping the same amount of infill as the left side of your shovel. Holding it crooked can cause unwanted bumps in your finished surface and can negatively affect the artificial grass installation.
There is more finesse to it than just throwing sand on the grass. You want to work in straight lines and be sure to get total coverage across the entire grass surface. With experience, you will have the infill falling out of your shovel just like a drop spreader would have dropped it.
A drop spreader with an adjustable spread rate is your sure bet for a consistent infill layer. Stay away from the rotary spreader’s, you want a nice even drop out the bottom. As shown here in the video we’re dropping around 1 pound of PureZEO Pro per square foot of artificial grass. Be sure to keep your speed consistent throughout and fill any areas not reachable by the drop spreader by hand once you’re finished.
The second layer of infill on this project will consist of one pound of wonderful dropped per square foot of grass. This is part of the Bella Turf pet system and has proven to eliminate most pet odours in the grass.
The green colour of Wonderful artificial grass infill makes it a beautiful choice, however, pay close attention to your rows with the spreader, as it disappears visually into the grass as you drop it.
Consistency is key with your infill layer. The smoother you spread it, the smoother your surface will feel underfoot once it is all broomed in.
Also check out: PureZEO Pro Artificial Grass Infill (new product)
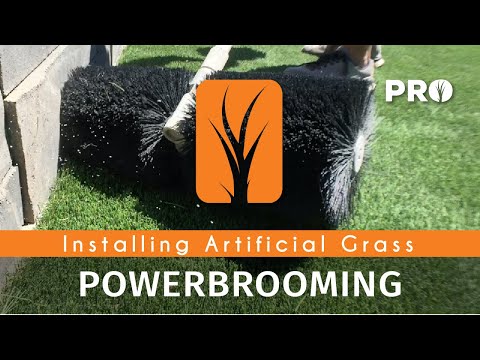
8. Powerbrooming Artificial Grass
To get your infill layer to drop completely down into the backing of your grass, the object is to brush the grass blades back, allowing the infill to drop in and not just pushed across the surface.
When using a power broom on your artificial grass, it is important to not throttle too hard as you will do more harm than good. With firm downward pressure, ease the throttle on until the power broom is pushing you backwards. Keep firm pressure and walk backwards slowly as you work the infill deep into the artificial grass. With a low throttle, you will avoid throwing infill into unwanted places and you will end up with a smoother layer beneath the blades.
Work in rows and overlap your passes to make sure all of the infill is dropped in and all of the blades are standing vertically. Use this technique until there is no visible infill on the surface of the artificial grass installation.
To work tight up against walls, angle the power broom so that the axle is away from the wall but the bristles can brush down into the corner. You will find the right angle with a little practice. Smooth out all of your perimeter edges and broom over your newly installed grass surface, making sure it is all brushed up and standing tall.
We recommend a power broom similar to this one on Amazon.
With your infill all settled into the grass and the blades evenly brushed up, it’s time for the final touches.
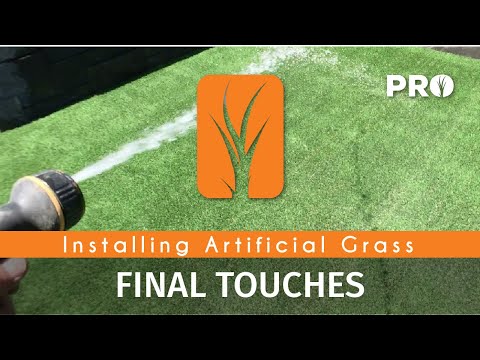
9. Final Touches to Installing Artificial Grass
Often after infilling, excess infill can get trapped between the outer grass blades and the perimeter wall, causing them to lean away from the wall and press into neighbouring blades. To remove this infill and allow your outer grass blades to relax, use a shop vac around all edges of your project area that have a perimeter wall. This will give you a loose natural finish to your edges.
For the blades that didn’t get a chance to stand up because of the infill trapped behind them, now is the time to properly brush them back up against the wall with your power broom.
To remove any debris left on the surface from artificial grass installation, feel free to use a leaf blower before giving the area a thorough spray down with the hose. Some infills can leave a light dusting on your grass blades, so it is important to give the blades a good rinse to allow their true colours to show. This will also assure you that there is no infill left on the surface and it is all settled deep into the grass giving you and your loved ones a beautiful artificial grass lawn for years of enjoyment to come.
Thanks for watching we hope these steps help you create your own outdoor place to escape. Explore our website for more. You may be interested in answers to the most frequently asked questions we receive about artificial grass.
Thank you for watching and learning the Bella Turf artificial turf installation process. We hope these steps help you create your own outdoor place to escape. Explore our website for more!
")

