Last updated on Wednesday, April 13, 2024 by Tyler Trowbridge, Bella Turf
When installing artificial grass, it’s crucial to follow the right procedures from the start to avoid ending up with a setup that doesn’t meet your expectations. At Bella Turf, we’re not only leaders in advancing product technology but also in refining installation techniques and procedures. As our products improve, so do our methods.
Seaming artificial turf can be particularly challenging, especially if it’s your first attempt. This article aims to assist you in preparing to lay a perfect seam for your artificial turf. We provide both the products and the expertise necessary to achieve a top-quality artificial grass installation.
Most important is to ensure you follow our seaming guidelines. These simple steps will make or break your seam.
The following diagrams explain the most common mistakes when it comes to seaming. Follow the provided instructions and create seams that are unnoticeable once your project is complete. The outer three tuft lines on either side of the grass tend to lean to the outside.
- We recommend cutting off 3 tufts prior to making a seam.
- We recommend leaving a 3/8″ inch space for your seam, too little space will create a “mohawk” down the seam, too much space will crease a “valley” down the seam.

Artificial Grass Full Seaming Instructions
Now that you know the most important seaming guidelines, you’ll be ready to start seaming. If you need a refresher, here are the full instructions on seaming the turf. Below, we have a video guide as well that goes over the exact same steps.
- Place the second roll of turf as close to its desired position as possible.
- Flip the edges over and remove the last 3 to 5 tufts on each side of the seam, keeping the blade closest to the tuft on the main piece to minimize excess backing in your seam.
- With the edges cut off, align your pieces so that the tufts land the same distance apart as they are throughout your turf (1/8” – 1/4” gap between tufts with no excess backing on 3/8” tuft gauge products).
- Spike both pieces in place and re-check your alignment.
- Fold both pieces back 8-10” and lay seam tape centered on your seam.
- Spread seam glue evenly with a spreader, removing all puddles and leaving behind no dry spots on the seam tape. A THIN, consistent coat is ideal as the glue expands when cured and can come up through the turf if applied too heavy. Please take this into consideration when gluing your seams, DO NOT OVER APPLY.
- Starting at one end (extra hands recommended) bring your two pieces of turf together evenly like a zipper and lay them down together keeping the fibers upright and out of the glue.
- Rub your fingers down the seam and pick out any trapped blades.
- Place 12” wide strips of wood down the seam and weigh them down with bags of infill 45-60 mins per seam.


Artificial Grass Seaming Videos
This step-by-step video series breaks down each important step to the artificial grass installation process to help provide you with the knowledge that it takes to install it yourself. Follow along and learn how to transform your yard from dirt to clean green space to enjoy for years to come.
We cover turf plans, base preparation, rolling out your grass, cutting and installing, spiking, seaming, infilling, power brooming, and final touches to complete your artificial grass installation.

Artificial Grass Installation Video Guide (2024)
Last updated on April 13, 2024 by Tyler Trowbridge @ Bella Turf Installing Artificial Grass We all want that lush green grass at home but not everyone wants to put in all the work that it takes to keep up with it. For some, maintaining a lawn is a hobby, but for others, it's simply [...]

Cutting Artificial Grass to a Curved Edge
Cutting artificial grass around objects can be intimidating for some. It's not like sod where you can just chop up small chunks and patch in the holes. Utilizing a sharp blade and a precise cut will leave you with a finished edge that looks great for years to come. Follow Nate from Bella Turf in [...]

Stay away from 90 degree seams when installing Artificial Grass
We recommend against 90° seams for a few reasons, but most importantly is the difference in tuft spacing when you turn the product 90°. Not only will the spacing change, the shape of the yarn will also be different when viewed from another angle. Keep your grass facing the same direction on your seams [...]

How To Seam Artificial Turf Correctly
Last updated on Wednesday, April 13 @ 2:29 pm by Tyler Trowbridge, Bella Turf

Applying TurfTac correctly for a perfect seam
Invisible seams are always the goal when it comes to the perfect artificial grass installation. Using the correct amount of glue can make or break a great seam, here’s why. TurfTac is one of the strongest seam adhesives on the market and expands up to 200% once cured. If the glue is applied in excess, you […]

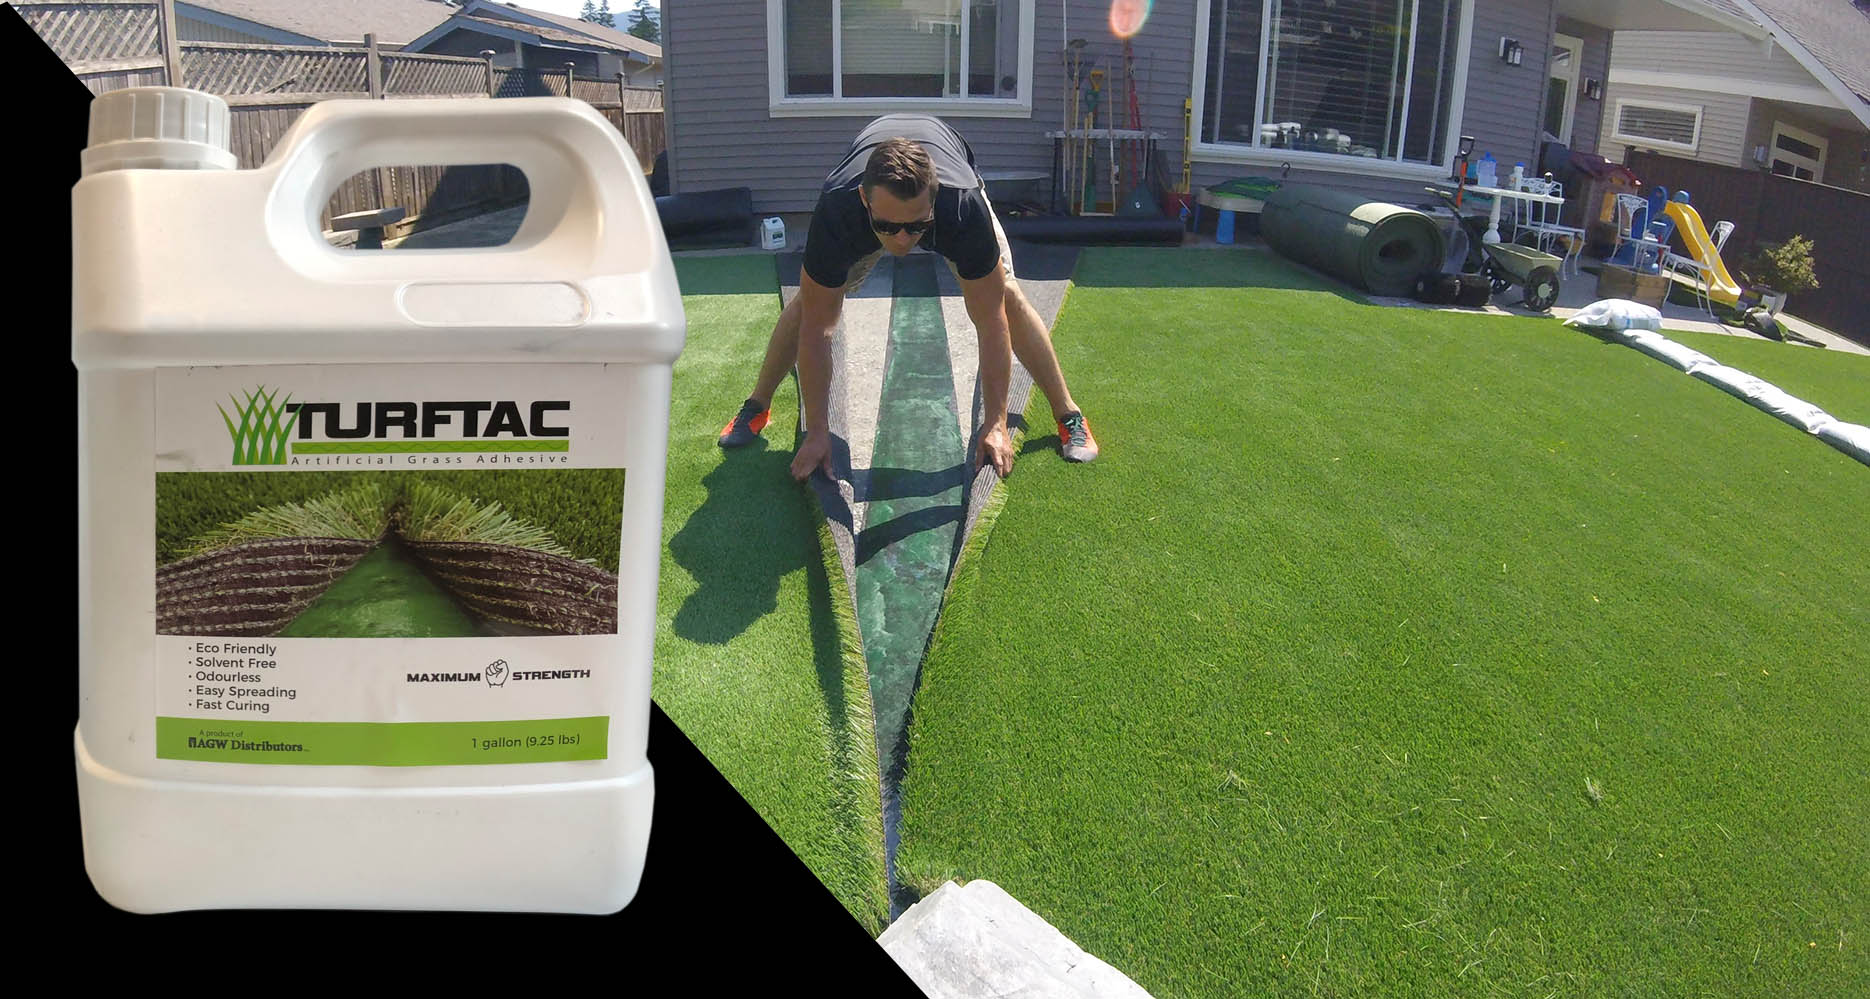
TURFTAC for flawless seams
Over the years we have used just about every type of turf adhesive there is. Through our own research and development came TURFTAC. This glue creates a bond between the backing and seam tape like never before. With faster setting times and a stronger hold, TURFTAC has helped our contractors create their best seams yet. […]

To learn more about our artificial grass you can view all of our products here.
To find artificial grass across Canada use our convenient Artificial Grass Dealer Locator.
When installed by an authorized dealer, our artificial grass is covered by a 10 year limited warranty. Convert your natural grass lawn today and start living with the benefits of a environmentally friendly, care-free lawn.
Subscribe on YouTube (Bella Turf) for more artificial grass videos. Follow us on Instagram, our profile is @bellaturf.
")

